How To Make Your Own Bodysurfing Handplane

02 . 04 . 21

For those of you that have bought one of our handplane kits, this How To guide will take you through each step of the making of your bodysurfing handplane at home. If you don’t have one of our kits, you’ll likely still get plenty of use from the words below.

Enjoy the making!!!

If you have any further questions, feel free to drop us an email.

CLEARING A SPACE

To get to work on your handplane, it is a good idea to clear a space on a workbench or table. You will be generating sawdust and sanding dust, so make sure you’re able to clear up easily or, if the weather permits and you have access to some outdoor space, you mind find it enjoyable to do outside.

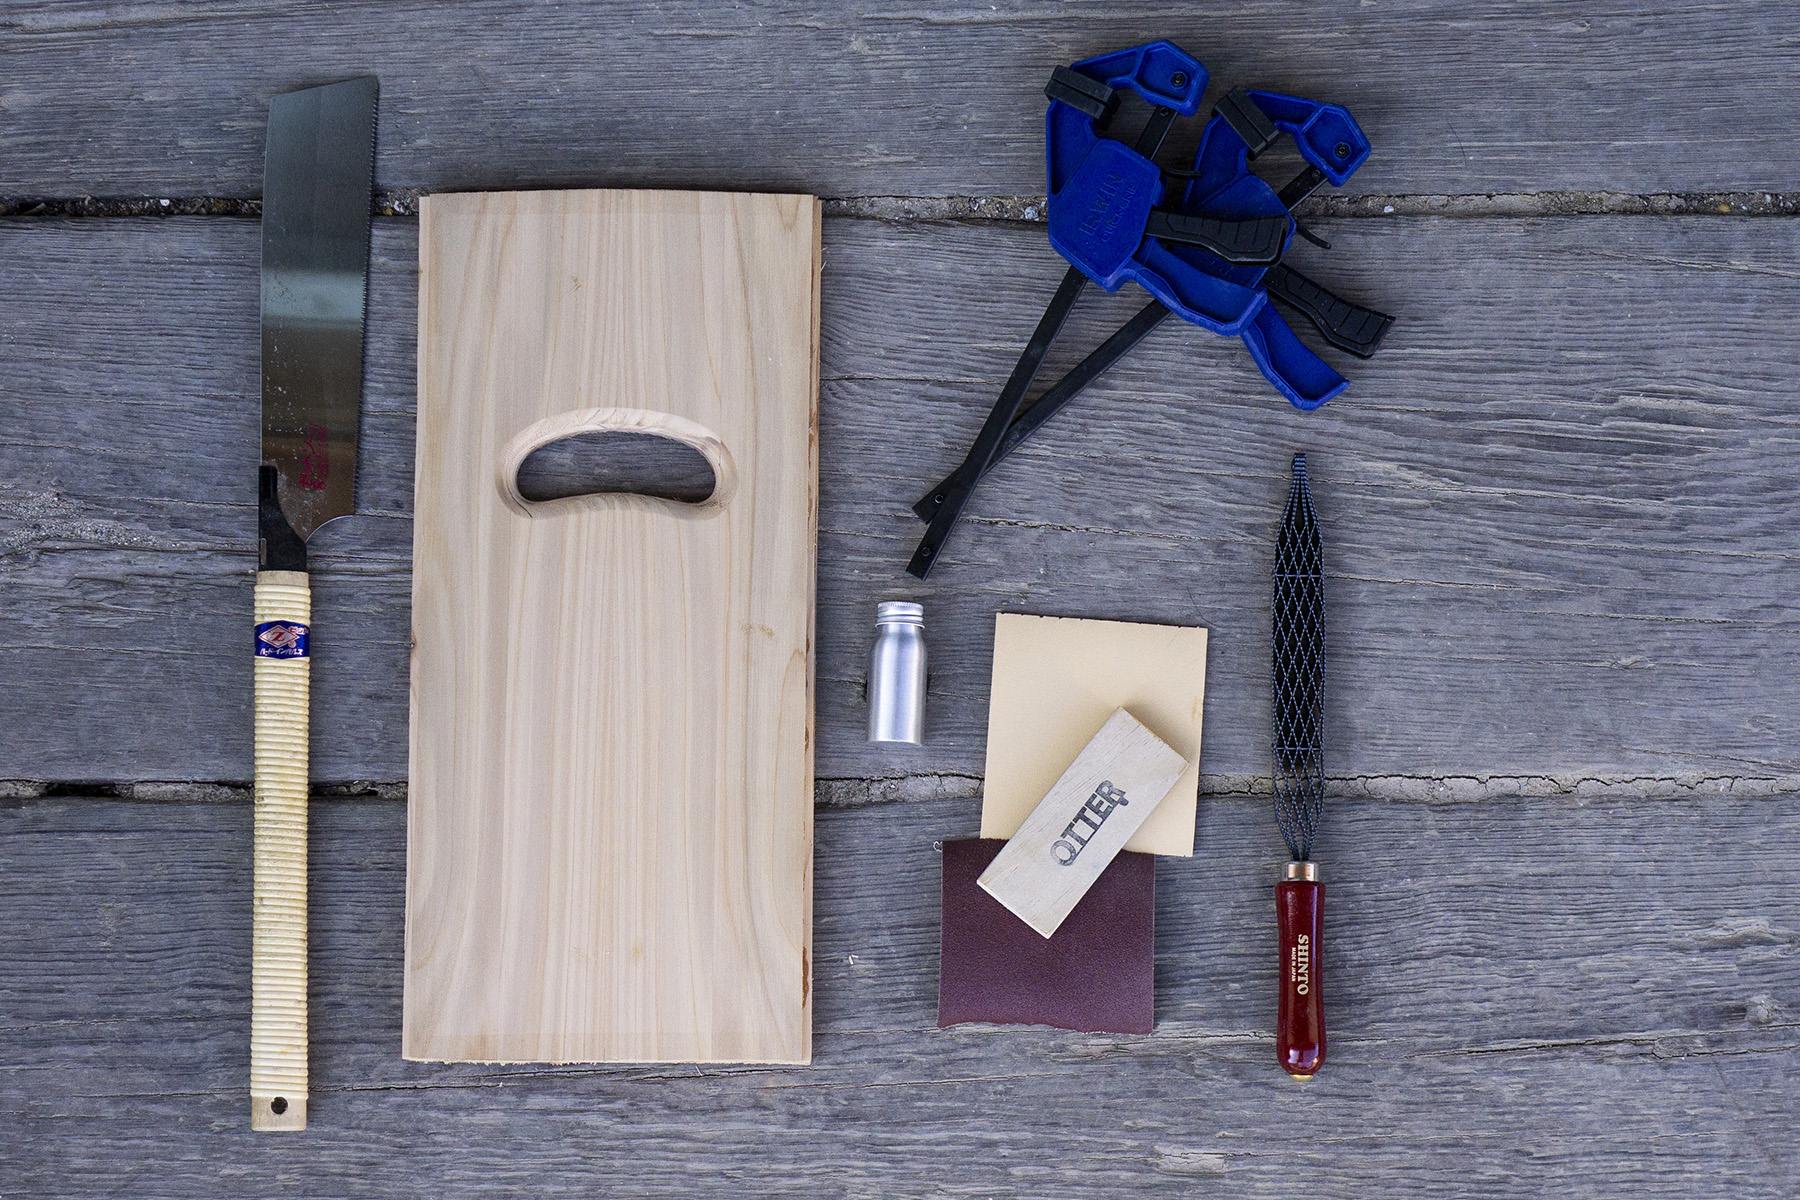
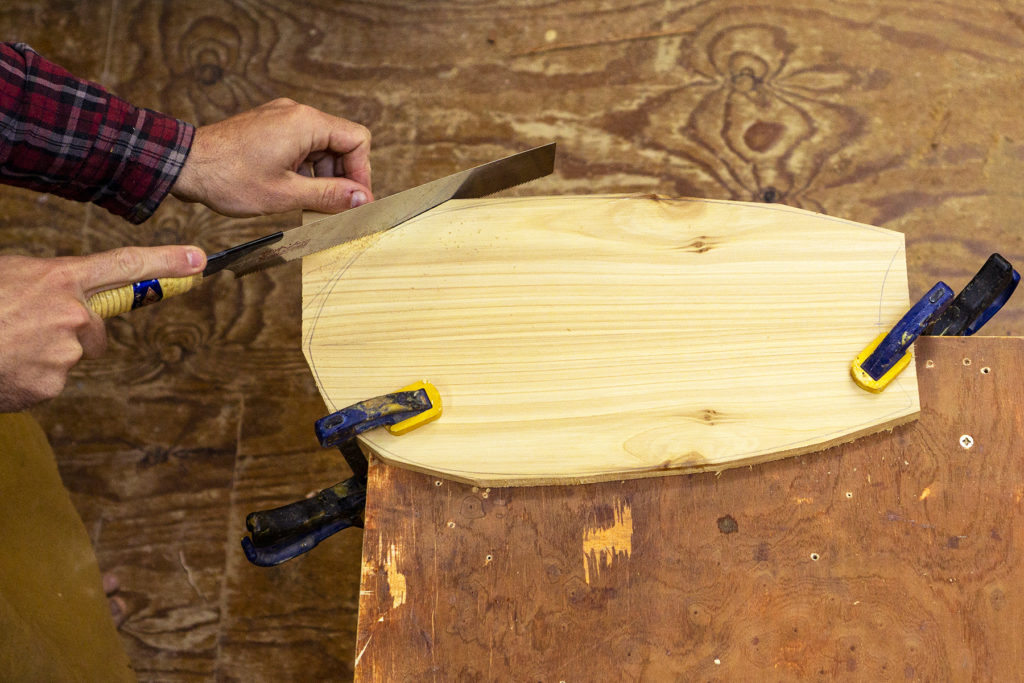
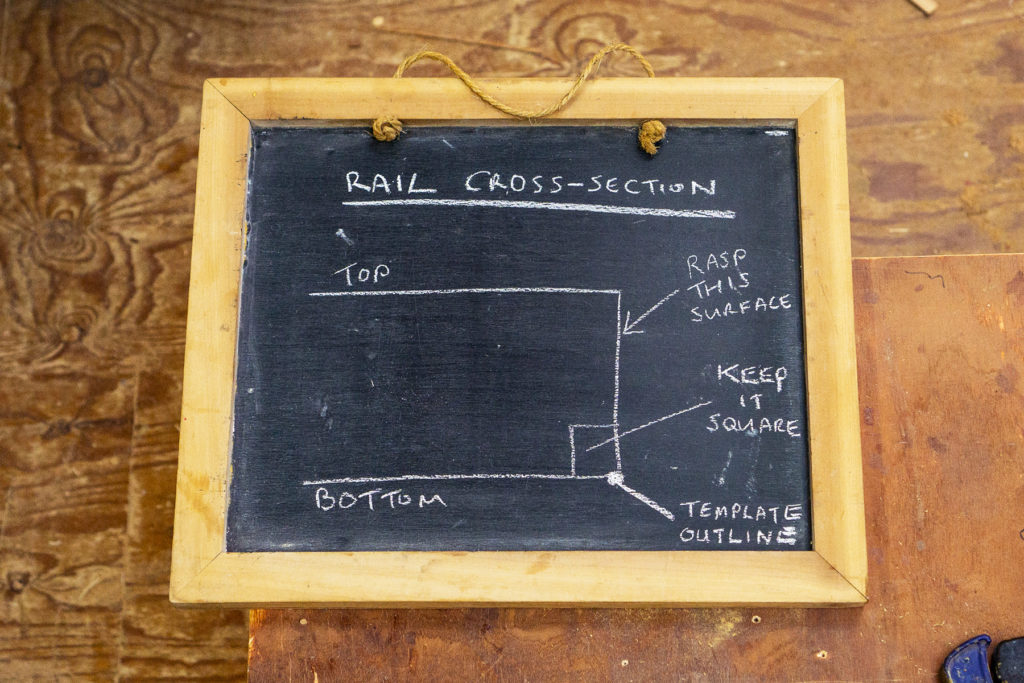
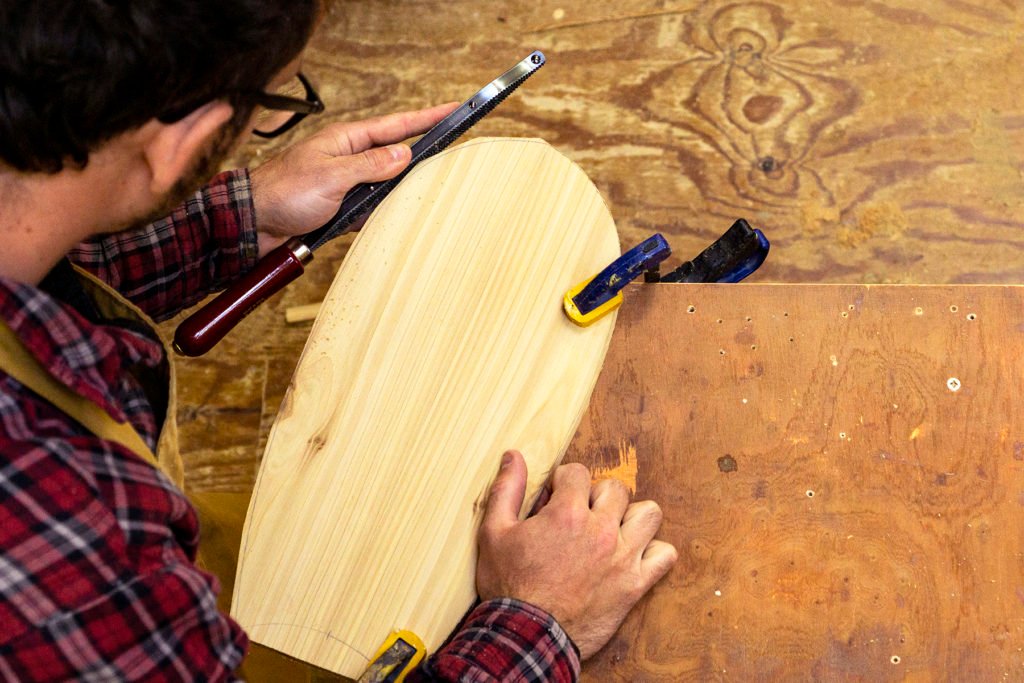
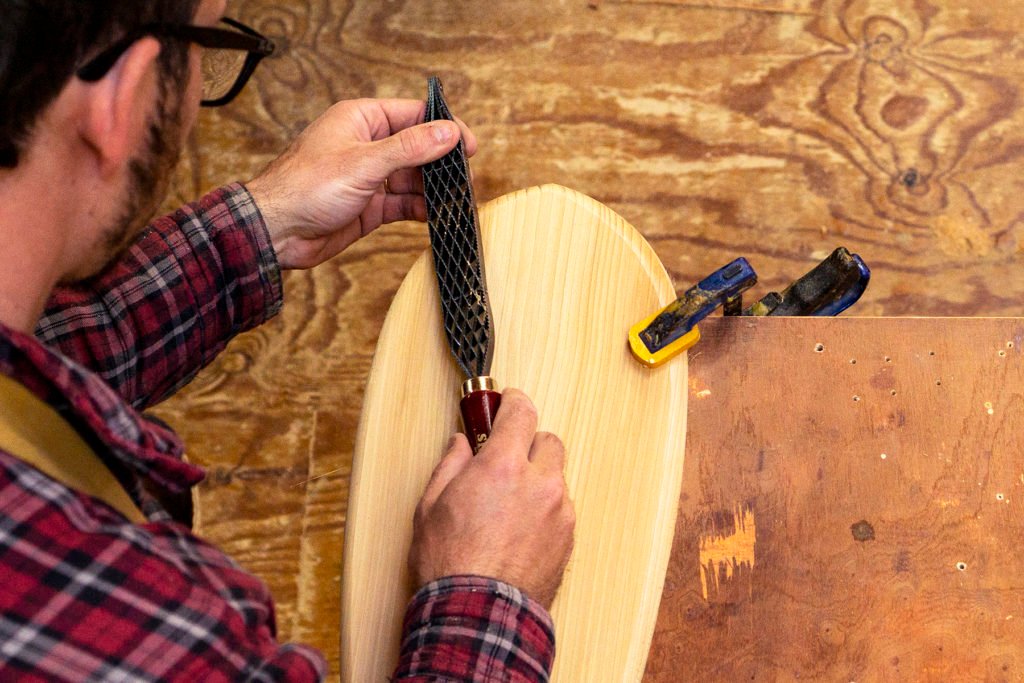
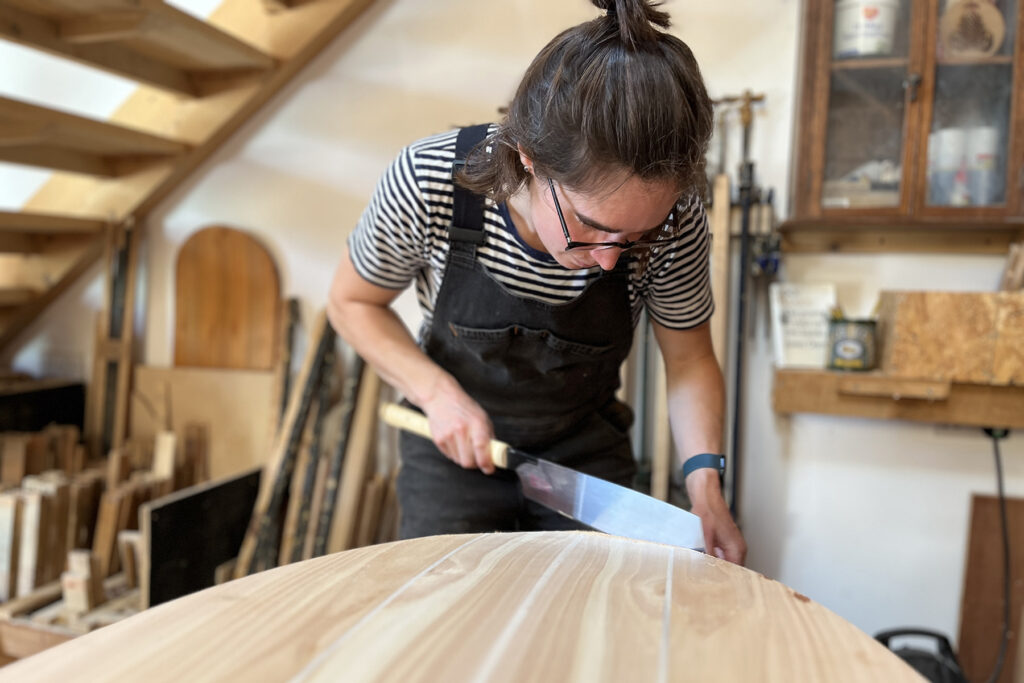
We will be doing most of the work on your handplane with the top side facing down and the underside (with the pencil drawn templates) facing up. To hold the handplane in place whilst you are using the saw or rasp, you will find it useful to hold the handplane securely in place using a couple of clamps. If you have bought one of our tool kits, you’ll find two just like the ones we use in the workshop.

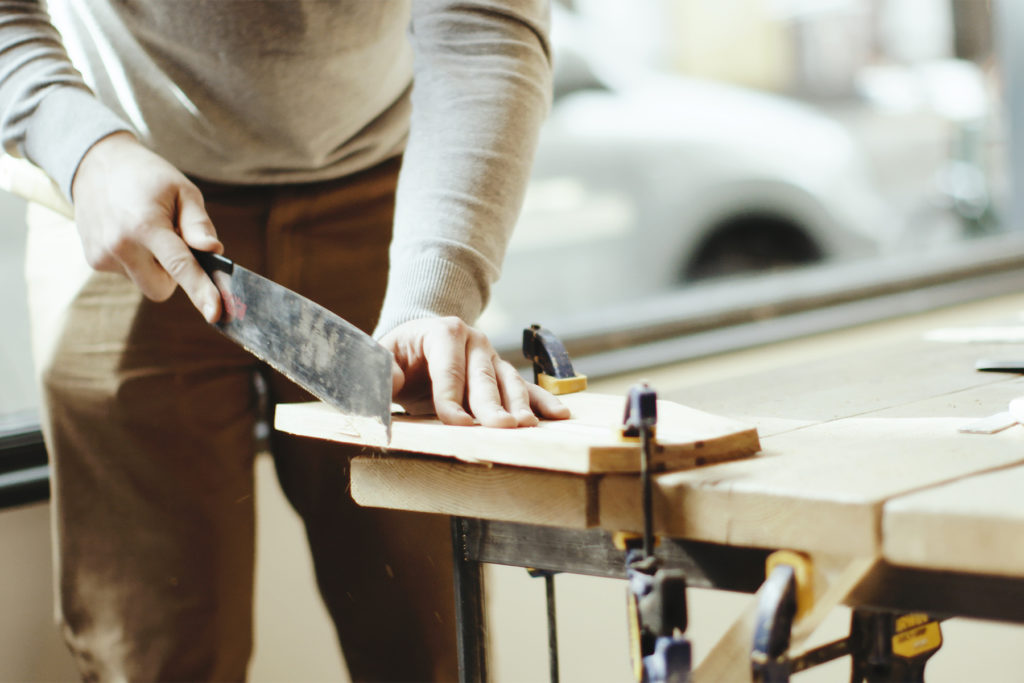
I always find it easiest to work from the corner of a table/workbench so you can hang part of the handplane off the corner for easier cutting and rasping. Hopefully minimising the risk of damage to your table.

The handplanes can mark easily, so make sure the surface you are working on is smooth and clear of any dust or lumps. It is worth constantly checking this throughout the making.

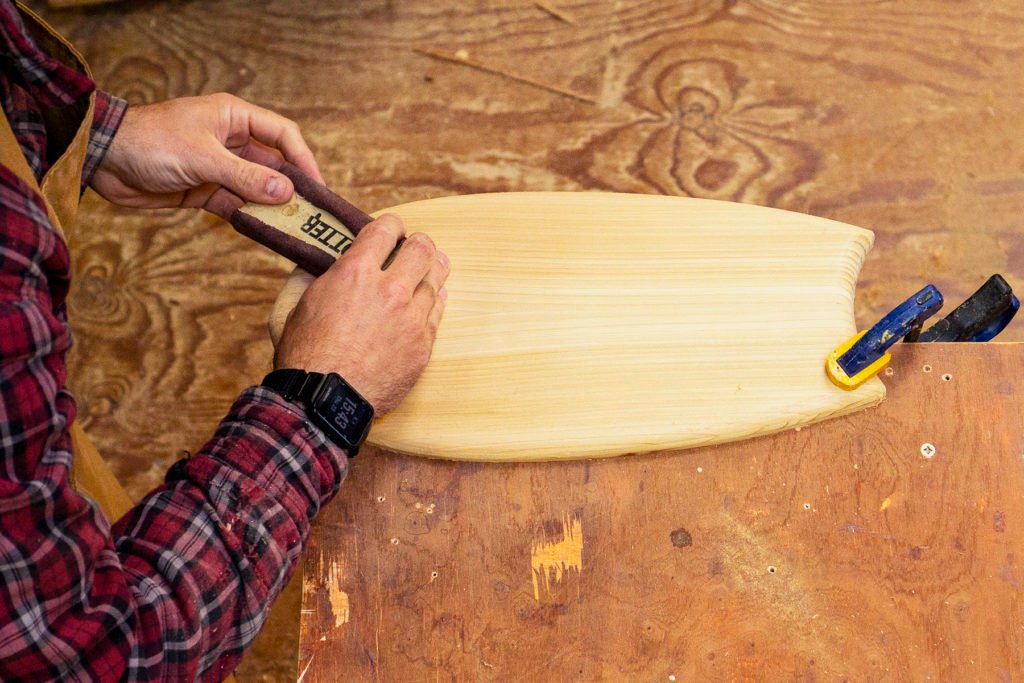
Towards the end, when we get into the sanding, you may find it helpful to lay a cloth on the table to reduce the risk of picking up any marks or dents although I often find that by this point I will stop using the clamps and will hold the handplane in my hands to sand it.

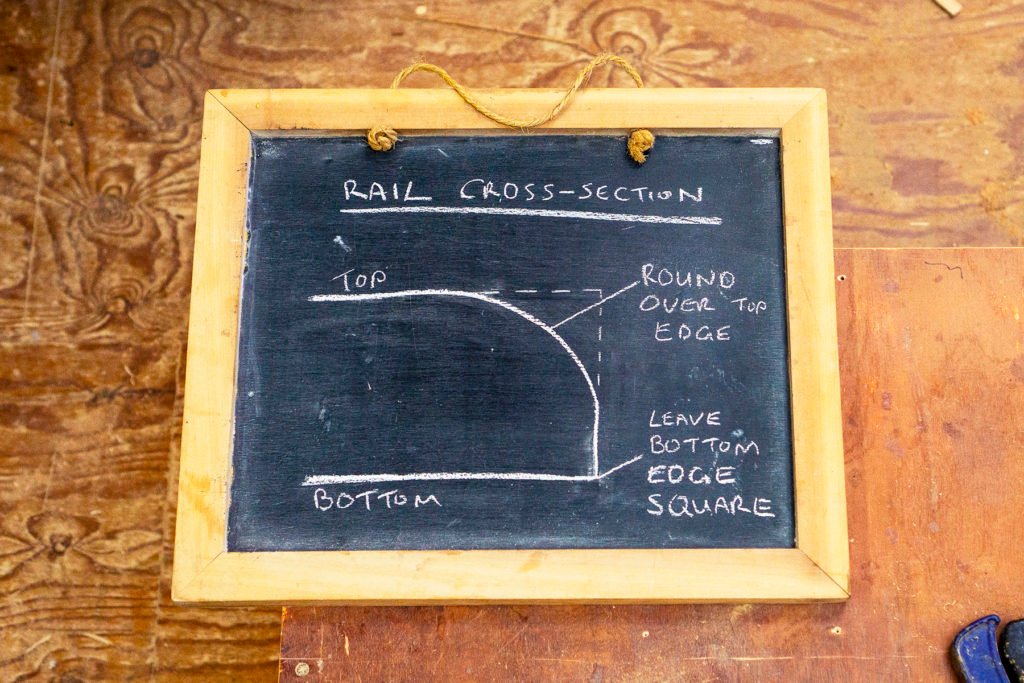
Throughout the making, it may be worth reminding yourself that you can always take more wood off, but it is much more difficult to add it back on. So take it steady, enjoy the process and know that there is now ‘right’ or ‘wrong’ way to do it.

PICKING YOUR SHAPE

With your handplane blank in front of you, you can see that we have drawn a couple of options for your template, or shape, onto the underside in pencil. We have drawn on the Rounded Pin (the biggest of all of our handplanes) and the Diamond Bob (our mid-sized shape).

The first thing you have to decide is what template you’d like to choose for our handplane. Obviously, you are welcome to come up with your own template, but we thought we’d show you a couple of ours as guidance.

There will be a few things that will influence your decision here, but typically the larger the handplane the more lift and speed you will be able to generate, but the less maneuverable it will be. We have a range of five templates that we have tested and use regularly and find that something that is about 50-70mm wider than your hand and 100-150mm longer than your hand is a really good place to start.

If you are creating your own template out of paper or card, you will find it easier to only draw half of it with a straight line on the other side so that when you come to draw it on your handplane, you can simply put the straight line in the center of your handplane and flip it over to mirror the shape on each side.

The outline of our templates take inspiration from classic surfboard templates, but we have also experimented with some shapes that we are intuitively drawn to and seem to match the dimensions of our hands better. Relating the shapes back to our hands and making them more human in their design seems to be the best way to go. In all honesty, whilst there are differences between the way all of the shapes feel in the water, they can feel quite subtle, so we encourage people to pick a shape that they most enjoy the look of and are drawn to. All that happens through use is that you learn to enjoy the one you’ve picked and the longer you use it and the more conditions you take it out in, the more connected and in-tune with it you’ll feel.

REMOVING THE EXCESS TIMBER

Once we are set on the shape we would like to achieve, the next step is to remove the bulk of the excess of wood.

In the workshop we have a rack of Japanese pull-saws for doing this and if you bought a tool kit from us, this is what you’ll have in front of you. You’ll need to assemble it by slotting the blade into the rattan handle.

If you don’t have one of these, any wood saw will do, though I would encourage you to stay away from powered ones and stick to hand tools. When using any hand saw, the two most important things to remember are slowly and gently. There is no prize for finishing quickly and the only way you can improve your technique will be by sawing slowly enough that you can be aware of all of your movements. The reason you need to be gentle is that a saw will do all of the work for you, so you do not need to put any excess force or pressure into the cutting action. What we find is that when people do, they often tense up, which is when errors are more likely to occur and it’s what causes cramping in the hand, wrist and forearm.

So with this in mind, we’re hoping to remove a huge part of the excess timber, cutting to about 3-4mm outside of the line of our template. This leaves enough tolerance to allow for most inaccuracies, but also doesn’t leave us with a mountain to climb in the next stage. Do this by cutting a series of straight lines that come close to the outline of your template, don’t try to bend the blade to follow any curves.

Do your best to keep the saw blade perpendicular to the handplane blank too. This is to avoid undercutting the outline at any point.

REFINING THE TEMPLATE

Once we’ve removed all we can with the saw, we swap down to a Japanese saw rasp, which is much like a file, but because it uses narrow teeth like a saw, rather than wider teeth like a typical rasp or surform it is much more forgiving. The narrow teeth cut into the wood, and are less likely to pull at the grain and cause tear-out, so the saw rasp allows you to shape the blank back to our desired outline with much less risk.

We are aiming to keep the outline of the handplane perpendicular (square) to the bottom of the handplane at this point, so that the template stays true throughout the thickness of the handplane. You are aiming to remove all of the wood outside your pencil line of your template, but will hopefully still see the pencil line at the end.

During this process, we start to feel the outline of the handplane with our hands and can address any lumps and bumps in the shape that we want to avoid to make it all nice and smooth. Trust your hands, they will likely pick up on things that your eyes cannot see.

SHAPING THE RAILS

Once we have brought the handplane shape right back to follow the outline smoothly, we then start to look at how it is going to interact with the water and shape the rails according to what will perform best.

When we talk about the shape of a rail, we are thinking about it’s cross-section.

A hard rail is one with a corner on the bottom of it and this is the one that will generate the most lift. A soft rail has a rounded edge on the bottom and this will invite water up the rail and create hold in the water as you move through it, i.e. it won’t slip about on the water’s surface. The blending of these two rails is crucial for surfboards, but with a handplane we have the rest of our body dragging behind us, so we needn’t worry so much about hold. We want to generate the most amount of lift possible, so a nice hard edge around the handplane will work best.

With this in mind, we continue to use the saw rasp to round over the top of the rail, making sure to leave the bottom edge well alone. If you look at your handplane, you’ll notice we have made it out of three layers of cedar. If you make sure you don’t touch the bottom layer, you’ll be able to preserve that nice hard edge on the bottom quite easily.

The amount you round over the top of the rail is completely up to you. It has little impact on the performance of the handplane so it’s more a case of finding something that feels right to you. If you struggle, trying to create the same roundover that you have on the handhole would be good.

SANDING

Once you feel like you’re getting close to your finished shape, jump onto using the sandpaper and the sanding block.

The cedar that your blank is made of is relatively soft and the lines of grain (the darker, winter growth) aere more dense than the summer growth that separates them. If you only use your hand to support the sandpaper, you may well introduce ridges that follow the grain. By using the sanding block all the time, you’ll find it easier to keep the handplane smooth.

Use the rougher (120 grit) sandpaper first and work your way over the whole handplane. Make sure that all of your movements follow the direction of the grain; we do not want to introduce any marks that go across the grain at this point as they become very hard to remove.

Once you have removed all of the marks from the saw rasp and run the sandpaper up and down the top and bottom surfaces and then into the handhole, jump onto the next grade of sandpaper (180 grit) and do it all over again.

This is a process of refining your handplane and by this point, we are taking away unnecessary marks rather than drastically changing the shape until we reach the point where we feel like the handplane is finished.

FINISHING

Once we have finished all of the sanding and shaping, we sign the handplanes and begin oiling it. This is so that the wood is protected from the elements and is preserved so that it can last as long as possible. We use a natural oil to do this, so the curing time is quite slow, but it means the environmental impact of the handplane is reduced. Once the oil has cured, it’s time to get out there.

Time to get the handplane in the sea and test it in various conditions to learn how it behaves and how to use it to make the most of the waves. Ultimately though, this is the fun part.

Riding those waves was the objective when we started on this journey, so it’s important that you take the time to enjoy these moments. Play in the sea. Smile. Laugh. Share it.

Your Basket

You don't currently have any products in your basket.