Offcuts: How To Make A Bug Hotel

06 . 06 . 19

​June is in bloom, and whilst the countryside around us bursts in to life and colour we are reminded once again of the plight of our pollinators and of how important bees and butterflies are to our ecosystem, and how essential insects are to soil health. These little guys need all the help that we can offer them, and one small thing that many of us can do is to provide a safe place for them to thrive in our gardens.

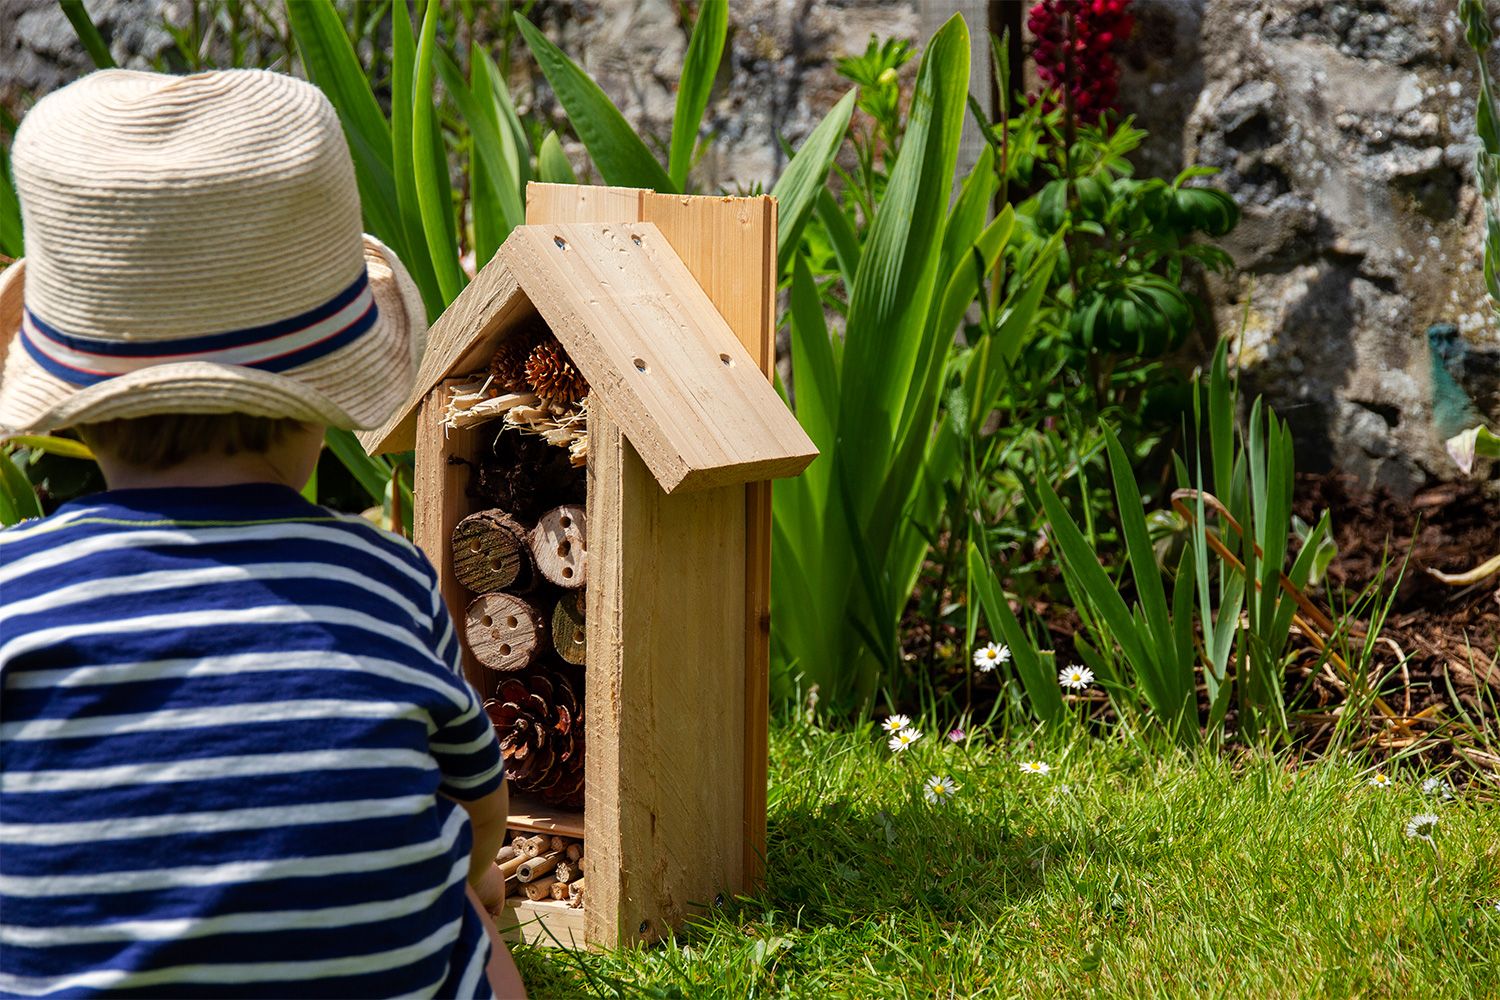
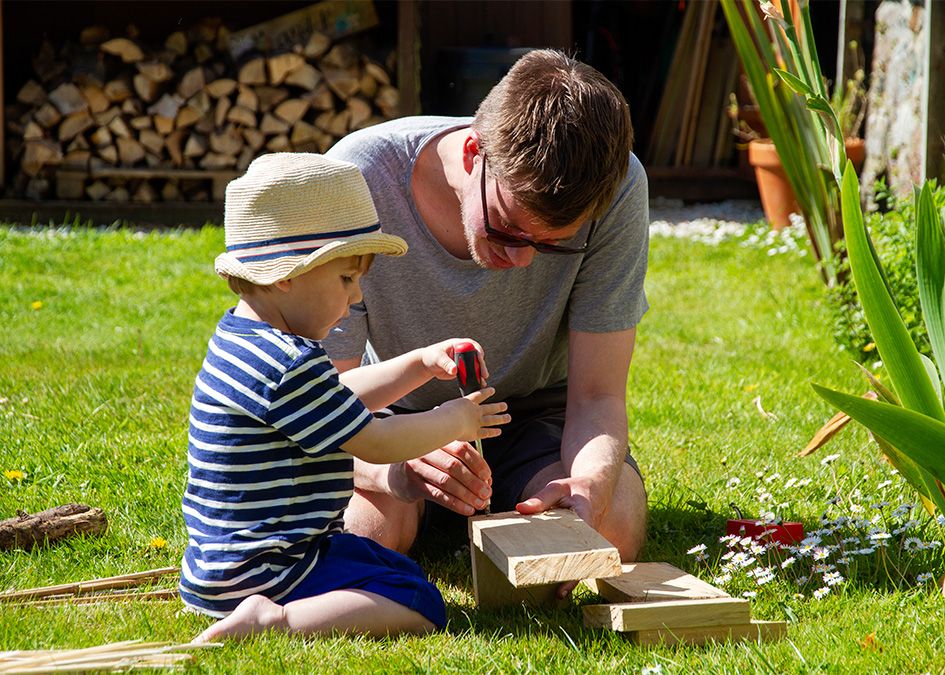
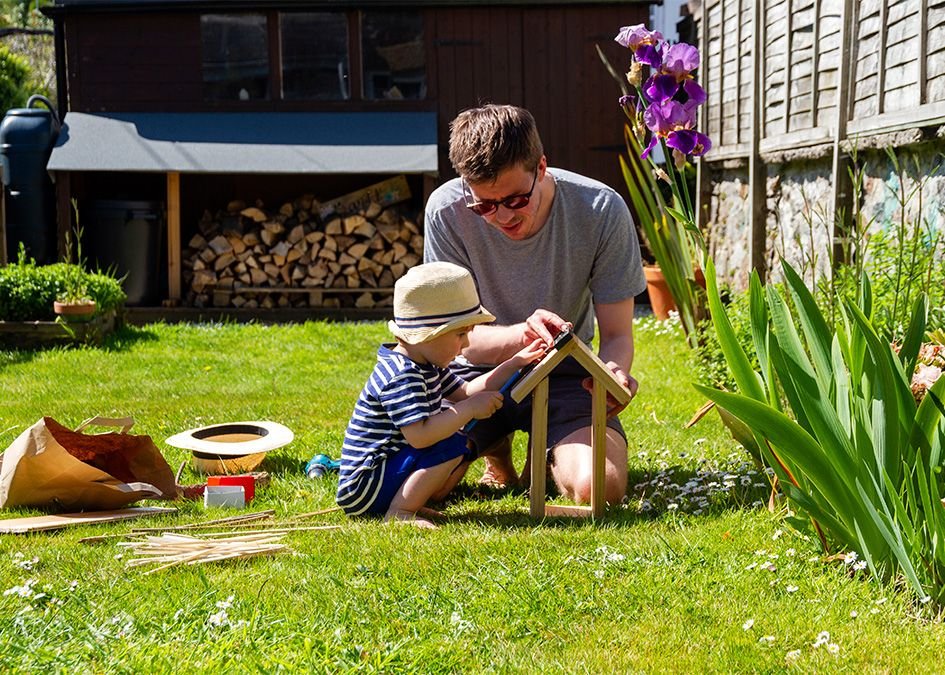
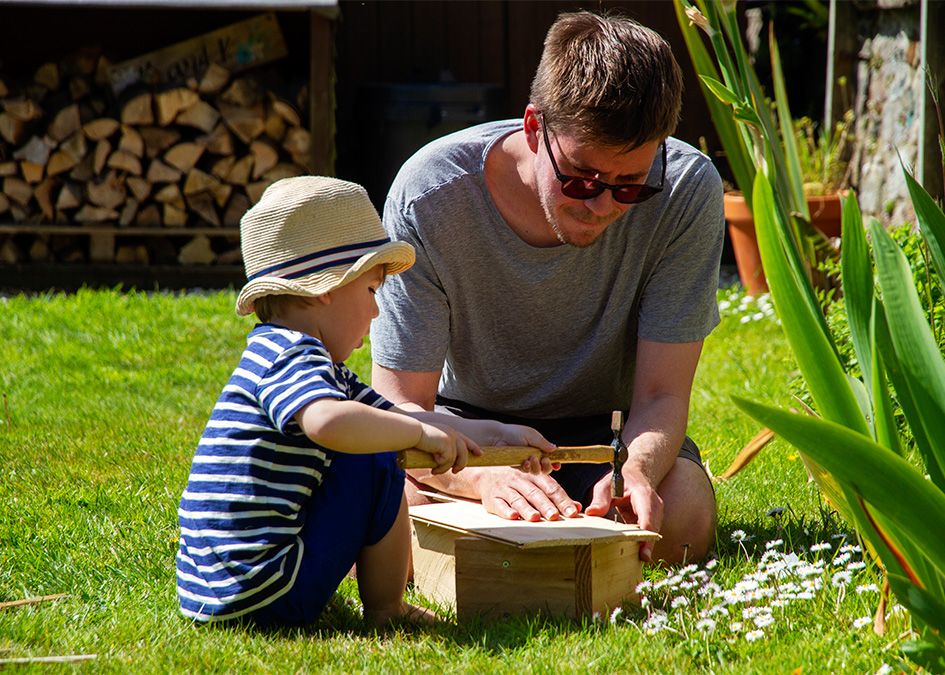
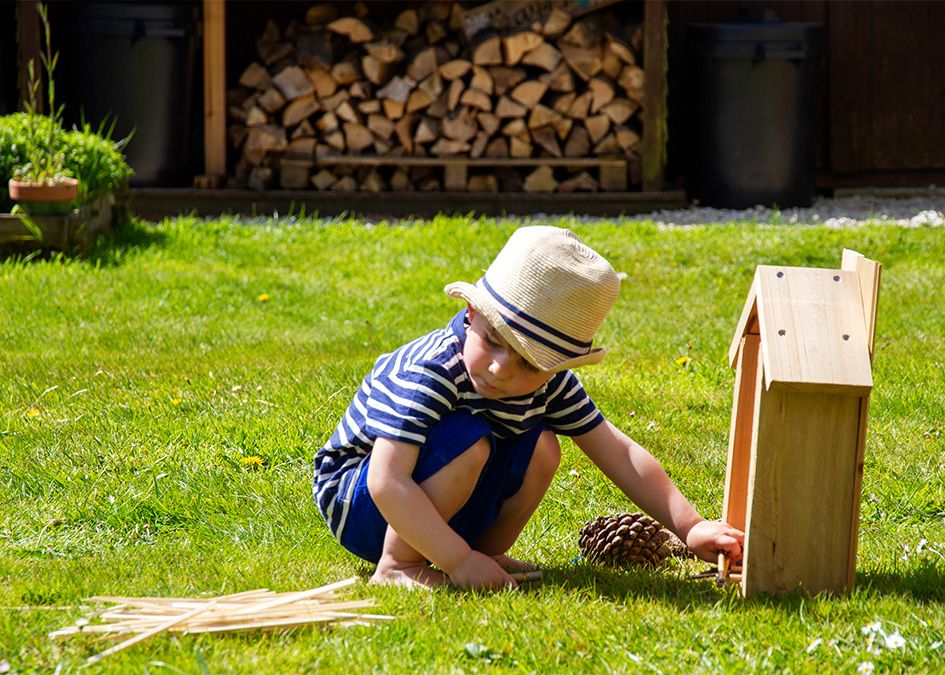
We are really proud of the fact that nothing goes to waste here at the workshop; offcuts from surfboards become handplanes, offcuts from handplanes become shavings for packing, and sawdust becomes briquettes for woodburning stoves. In the middle of May Mat took a couple of weeks off work for paternity leave to welcome a new arrival to his family, and before leaving he rummaged through the offcuts bin with a project in mind for some quality father and son time with his eldest child. One sunny morning, Mat and his boy Riley made a bug hotel to hang in their garden and provide a home for solitary bees and creepy crawlies. And, being Mat, he documented this making project to share in the hope that others might do the same (his wife Kate sat under an umbrella with their newborn to photograph the making process). Here’s his “how-to” guide for some quality and earth-friendly making time:

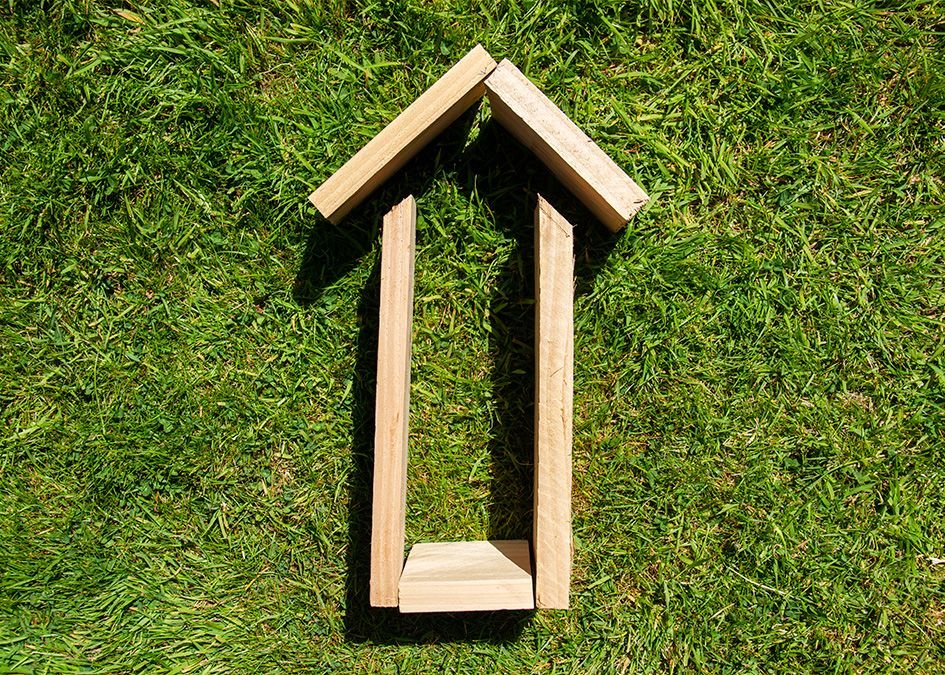
The first point to make is that this project is meant to be simple and achievable with minimal tools, no glue, and within the timeframe of a toddler’s attention span.

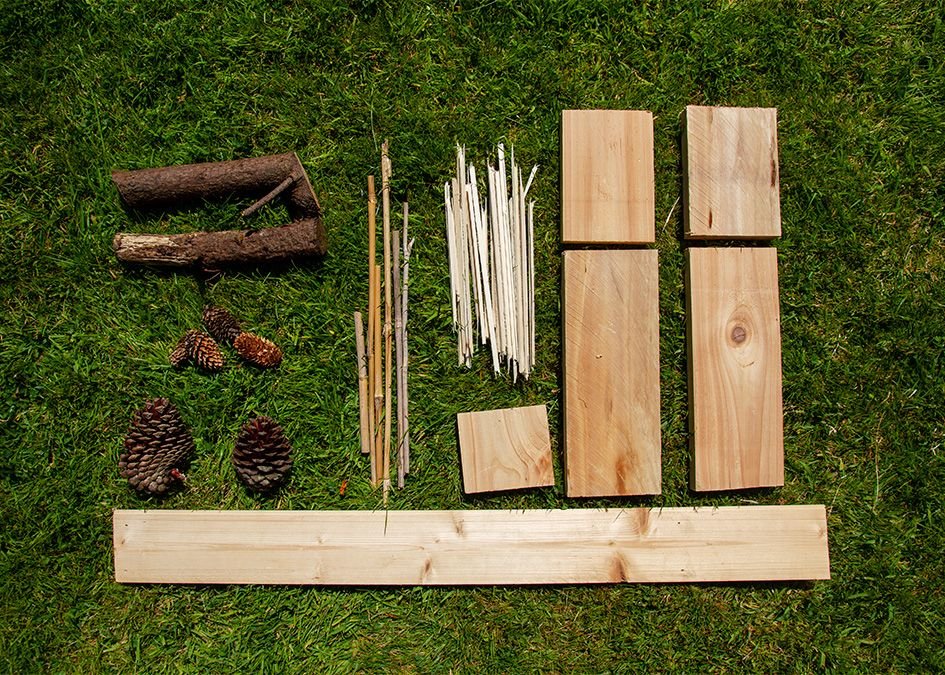
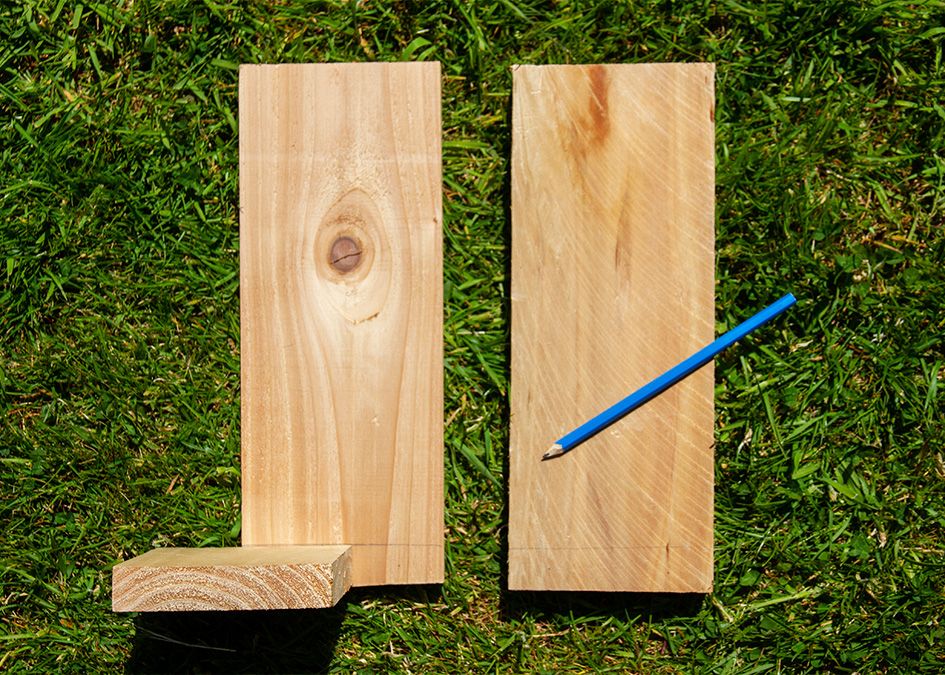
The second is that when it comes to making a bug hotel, is any offcuts will do: there are no set dimensions so you can use whatever you have available, be that offcuts from a fence or an old shelf. Ideally though, it’ll be untreated timber. I grabbed a couple of knotty pieces of poplar and a handful of bead-and-cove rail-strip offcuts from the bin at the workshop to add to some old bamboo garden canes and some small logs and pine cones that we’d collected on walks.

Our bug hotel was made in a “classic” house shape with a pitched roof, but that was only really because a small child was involved and he wanted to make a house for bees and insects that looked like a house. You could just make a simple box and it won’t make any difference to how appealing it’ll be to your intended residents. Don’t worry too much about overly accurate measurements; once you have decided on the shape and dimensions of your box, use a tri-square and pencil to mark any cut lines and use a tenon saw to cut them. Then, use the end of one of the cut pieces to template out the thickness of the joints and mark a line in from each side to give you roughly uniform points to drill.

Drill and counter-sink clearance holes (the diameter of your screws) in the outer pieces and smaller pilot holes on the inside pieces. Our “roof” was made with a simple butt-joint, which was then used to template the angles to cut at the top of the walls where the roof would sit. I did all of this the evening before, to minimize the amount of cutting and drilling I would have to do with an eager little boy trying to help.

Once you have the walls, base and roof of your bug hotel cut out, marked and drilled, it is time for assembly to begin. This is the point at which I enlisted the help of my small-person. Screw the walls into the base, and screw the roof pieces together.

Then, offer the roof up to the walls and base, and mark out where you need to drill holes to attach them. We carefully drilled the holes together (me holding the drill in place, and Riley pulling the trigger) and countersunk them, and then we screwed the roof into place. You should now have an open box in whichever shape you have chosen.

Now, to put a back on your bug hotel: I had a couple of pieces of tongue and groove in the shed so used that, but any timber of sheet material offcut of the right size will do. I cut this roughly to length before hand, so all we had to do together was line it up and secure it in place with panel pins. Parents, if you are doing this with your child then they WILL want to hammer in the pins and they WILL hit your fingers at least once. You have been warned! Use a tenon or coping saw to trim the edges of the back panel, leaving part of it standing proud to provide fixing points from which to hang your bug hotel (you could alternatively secure it internally before you fill it).

Construction complete, it is now time to fill your bug hotel. We used pieces of bamboo cane, pine cones (large and small), bark chippings, pieces of poplar bead-and-cove from the workshop (the profile of these provides lots of little spaces for insects to make their homes in) and some small logs which we cut to length and pre-drilled for solitary bees.

We didn’t use any glue or any wood stain (would you make your home in something soaked in chemicals?), so the bug hotel will age naturally and the structure itself may some day be bored into by insects for food or shelter. Fully assembled, you can now hang your bug hotel in your garden.

Ten days after hanging our bug hotel, Riley and I watched a mason bee going in and out of the holey logs, and watched a spider spinning a web between the roof and the fence it hangs from. Hopefully, this is just the start.

A Note on Mason Bees

Virtually all of the solitary bees at home and abroad are endangered.

The day after making our bug hotel, our neighbour gave Riley a small cardboard tube from his special bee house, and told us about the great work of www.masonbees.co.uk.

Red mason bees are solitary bees; they are not aggressive and the males do not have a stinger so there is little to no threat of them stinging (so they’re great if you have children). They are also fantastic pollinators because they feed their young pollen (rather than nectar) and so pollinate plants and flowers incredibly efficiently. Their numbers are declining and they need our help. Pre-drilled logs and bamboo canes make great homes for them but over time they can also become home to the parasites that threaten their larvae, and the population of red mason bees. The mason bees themselves cannot clean out the bamboo canes or holey logs where they lay their larvae, and neither can we. The good folk at www.masonbees.co.uk produce cardboard nesting tubes (£5.50/pack) that can be removed at the end of each summer. They unravel when soaked in warm water and the cocoons float to the surface, ready to be dried and stored safely over winter. They can then be placed in a small wooden “release box” in the spring to hatch and release. If that all sounds like too much hard work, they run a “Guardian Scheme” whereby they send you cocoons each spring that hatch, pollinate your garden and lay their larvae in the nesting tubes. You then send those tubes back to them and they open the tubes, screen for parasites, remove any cocoons inside, wash and sort them, before placing into safe storage over winter. They then send you a new set of cocoons the next spring, so each year you have a fresh batch of bees and by sending their larvae back you are helping the native bee population (surplus cocoons are used to create additional places on the Guardian scheme, boost stocks in commercial orchards or donated to academic researchers). How great is that?

Your Basket

You don't currently have any products in your basket.